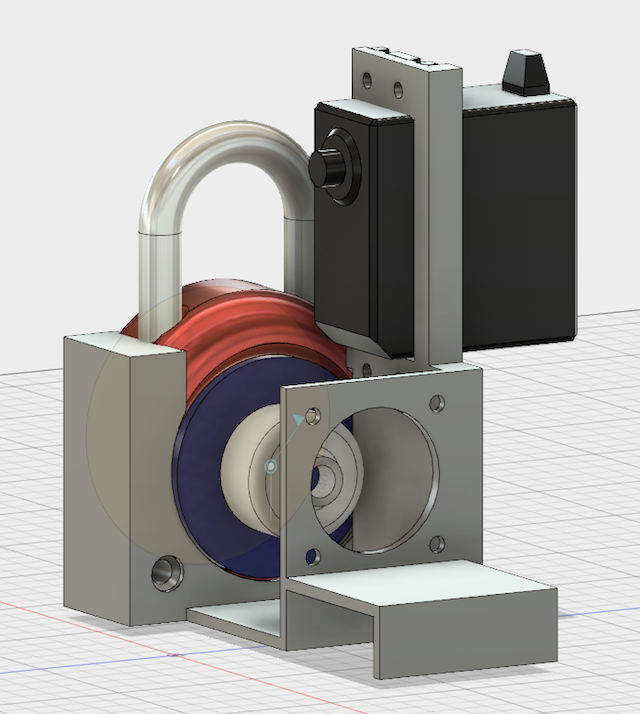
Combo Breaker is a motorized, battery powered, 3D printed, Arduino-based combination lock cracking device. It is portable, open source, 3D models provided, and exploits a new technique I've discovered for cracking combination locks in 8 attempts or less, but in an even more exciting, automated fashion.
By @SamyKamkar
Live demonstration and full details available in the video:
Point of Contact: @SamyKamkar // https://samy.pl
Video demonstration / explanation: https://youtu.be/YcpSvHpbHQ4
Released: May 14, 2015
Source code / 3D models: https://github.com/samyk/combobreaker
Unit Cost: < $100
Status: Operational, open source, open hardware, declassified.
I've included the models for 3D printing on my github: https://github.com/samyk/combobreaker
$15: A 5V Arduino Nano microcontroller is used as the brains of the project.
$8: I originally used an A3967-based EasyDriver which can drive a stepper motor up to 30V at 750mA. This is what precisely controls the dial.
$13: Instead of the EasyDriver, I upgraded to a smaller, yet more powerful stepper driver that can go up to 1 amp (1000mA).
$18: You can use a normal stepper motor for the "simpler" version of the Combo Breaker build, however if you're working on creating the more advanced version, you'll need a double-shaft stepper motor like I liste below.
$16: This double shaft stepper motor allows you to build the more advanced Combo Breaker while employing an optical rotary encoder on the back to detect the position of the stepper when the dial stops turning (which is part of the exploit employed).
$25: For use only with the double shaft stepper motor, this optical rotary encoder lets us know what position the shaft of the stepper motor is at and allows us to employ an exploit on Master combination locks where the stepper will get locked into certain grooves within the internal combination disc of the lock.
$15: This servo not only provides the torque we need to lift the shackle (90.26 oz*in), but has an additional wire providing analog feedback that we use to detect the state of the shackle and whether it has opened or not.
$5: If you're using the analog feedback servo, you'll want to use an external voltage regulator to provide enough juice to the servo. While the Arduino is 5V and can drive the servo normally, it won't be able to pump out enough current for the servo when it starts hitting the shackle and could damage your Arduino.
$14: This 500mAh 3S (3-cell, 11.1V) battery gives enough juice to the stepper motor to be very effective, and at 500mAh can last between 30-120minutes straight before having to be recharged.
$45: This lipo charger is overkill if only used for this project, but is a good one that I use at home for a wide range of batteries and cells. You don't need this one, but if you want to recharge the battery, you'll need a charger that supports 3-cell LiPos.
$8: Not required, but this is the thermal adhesive I use to permanently attach the heatsink to the stepper motor driver. Normal thermal paste has very little adhesion and kept falling off, so I switched from thermal paste to this thermal adhesive.
$17: If you don't already have digital calipers for precise measurements to measure the lock, for example, these are inexpensive and accurate.
$9: If you don't already have a breadboard and wires, they will kind of help.
Combo Breaker's source code can be obtained in entirety from my github: https://github.com/samyk/combobreaker
Point of Contact: @SamyKamkar
You can see more of my projects at https://samy.pl.
Thanks!